DIY Bar - Part 3
One Room Challenge Week 5 & 6
GOING TO THE DARK SIDE
I’ve spent the last two weeks of the One Room Challenge adding some big time moody vibes to the DIY bar space. This included sanding the bar (my least favorite part of DIY), staining the bar (my second-least favorite part of DIY), painting the bar nook and starting to antique mirrors for the backsplash.
BAR DESIGN PLANS
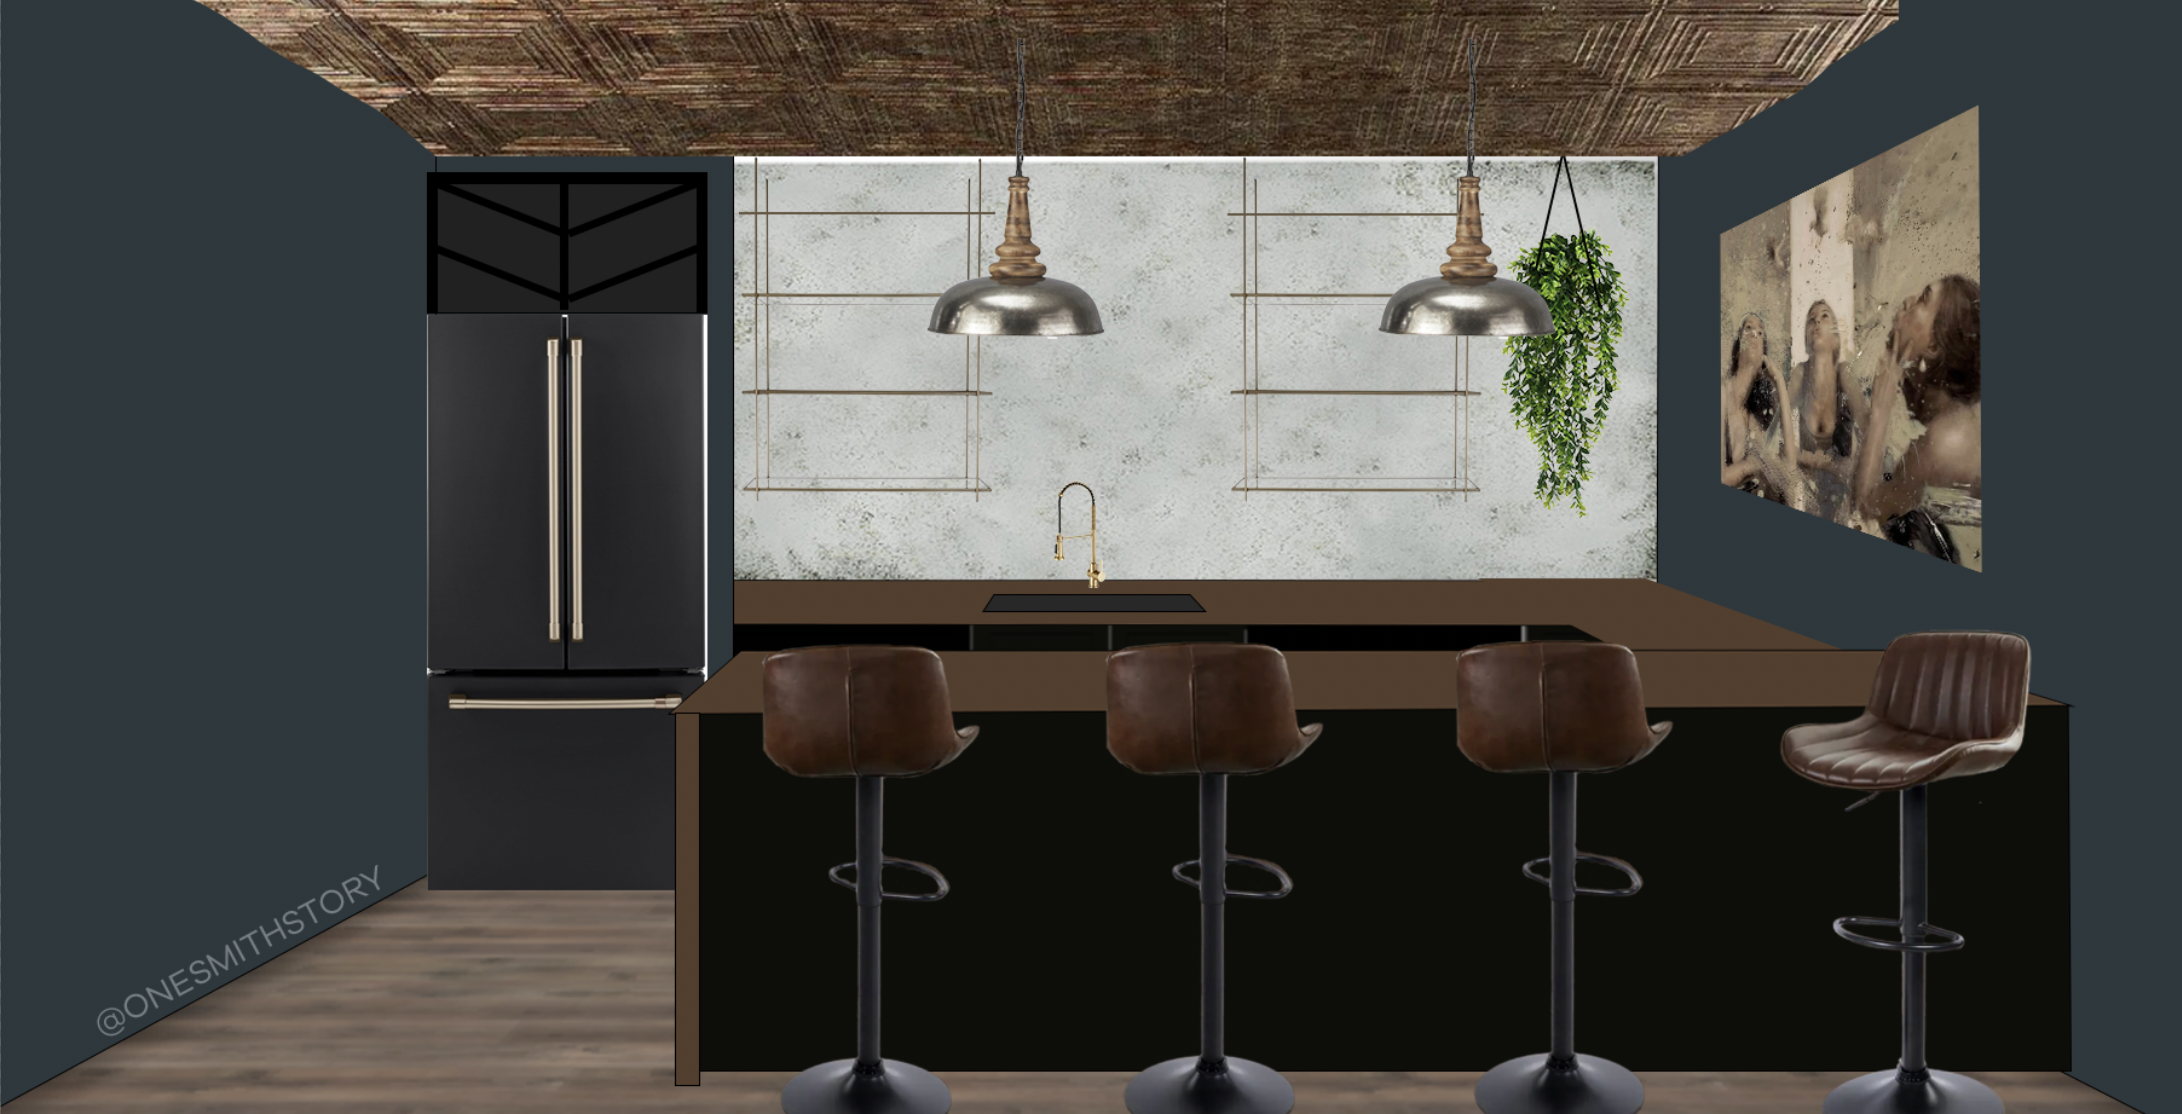
It looks a little wild right now because the final lighting isn’t in and there’s a big white space where the antiqued mirrors will go, so let me remind you of where we’re headed by bringing back the plan design to reference.
THE PAINT COLOR:
FARROW & BALL HAGUE BLUE
I’ve been wanting to try out Farrow & Ball paints forever. They’re known for incredible quality and a depth of color that few other paint brands have been able to achieve. I wanted to make this bar nook feel extra cozy and deep, so I opted for a rich, dark color: Hague Blue. (gifted)
So far just one coat almost completely covered the white space! Because the formula is such high quality, I will only need to do touch ups in a few areas rather than an entire second coat. Yes! (I need all the time-saving tricks I can get right now.)
BLACK STAINED DIY BAR
For background on how I built the bar, hop back here. As for finishing it, I wanted to stain it black to match the IKEA cabinets I used for the wet bar area. The IKEA cabinet fronts show a bit of wood grain which is why I opted for stain instead of paint. I ended up trying Varathane Poly+Stain in Black. (Again, looking to save time by combining the two steps into one.) I was a little nervous when I realized how thick and sticky the stuff is. But with a light sanding between two coats, it turned out just right!
DIY ANTIQUE MIRROR
I also got to work on one of the projects I’ve been excited to try: learning how to antique a mirror. Filling a whole backsplash with real antique mirrors would come with a hefty price tag. So I gave DIY a try with a few simple supplies. (And it totally worked!) I plan to finish the rest of the mirrors this week and write a blog post on the process later on. For now, you can get all the details in the “Antique Mirror” highlight on my Instagram page!
CUSTOM BRASS BISTRO SHELVES
Once the antique mirrors are installed, I’m so excited to add the most chic glass shelves with an aged brass finish. These are being custom hand-made and gifted by Iron Abode. I chose the Riviera style which I think will really help boost the speakeasy vibes!
WHAT’S NEXT?
Antique the rest of the mirrors
Bar area painting touch ups
Hang bar pendant lights
Plan and purchase lumber for fireplace framing
Be sure to check out my stories on Instagram to see more of the process, pivots and lessons learned along the way!


